Containerization of Laravel PHP8.3-fpm, MySQL, Nginx in Docker
ilosrim | 2024/07/17

What is Containerization?
Containerization is a lightweight form of virtualization that encapsulates an application and its dependencies, including libraries and runtime environments, into a single unit called a container. Containers are highly portable, ensuring that applications run consistently across different environments, from a developer’s laptop to a production server.
Why Containerize Laravel, MySQL, and Nginx?
Laravel is a robust PHP framework for building web applications, while MySQL serves as a popular relational database, and Nginx is a high-performance web server. Combining these technologies into a single containerized stack offers many advantages like isolation, portability, performance and scalability.
We are going to containerize a laravel application containing these components:
Laravel Application
MYSQL Database
NGINX Web server
Step 01:
Create a new laravel project in your local host or clone the laravel basic project from GitHub.
To Create a new project run this commands in your terminal:
Prerequisites: You should have php8.1 or higher and PHP package manager “composer” installed before running this command.
Here “blog” is the name of the project you can change it.
composer create-project --prefer-dist laravel/laravel blogcomposer create-project --prefer-dist laravel/laravel blogOR to clone a project from github you can use this command:
git clone https://github.com/laravel/laravel.git bloggit clone https://github.com/laravel/laravel.git blogStep 02:
Next we have to move to our project directory and create a new file named “docker-compose.yml” and add these configurations in it.
This configuration run a multi container environment including Php laravel, mysql and nginx.
1- App configuration
“app” service in docker-compose file build laravel application docker image from Dockerfile which is located is same directory where project files and docker compose file is located.
“image” is the name we want to give the docker image
“container_name ” is the name of container we want,
“/var/www” defines the working directory in running container,
“volumes” mount the project files and configurations from our system to container
“networks” defined the network for container.
2- Nginx Configurations
“webserver” takes nginx alpine image and assign container a name.
“ports” ports are important to understand, this is mapping nginx default port 80 to my host port 8989.
“volumes” mount the host files and nginx configurations to nginx container
“networks ” define the network for nginx container
3- MySQL Database configuration
“db” takes mysql image and and defines its container name
“ports” 3306 is the default port of mysql
“environment” sets environment variables (username password)for mysql db
“volumes” mounts the host with container for persistent data storage.
Note: All three services should be in same network to allow them to communicate with each other.
# docker-compose.yml

version: '3'
services:

  #PHP
  app:
    build:
      context: .
      dockerfile: Dockerfile
    image: ilosrim/php
    container_name: app
    restart: unless-stopped
    tty: true
    environment:
      SERVICE_NAME: app
      SERVICE_TAGS: dev
    working_dir: /var/www
    volumes:
      - ./:/var/www
      - ./php/local.ini:/usr/local/etc/php/conf.d/local.ini
    networks:
      - app-network

  #Nginx
  webserver:
    image: nginx:alpine
    container_name: webserver
    restart: unless-stopped
    tty: true
    ports:
      - "8989:80"
      - "443:443"
    volumes:
      - ./:/var/www
      - ./nginx/:/etc/nginx/conf.d/
    networks:
      - app-network

  #MySQL
  db:
    image: mysql:8.0.37
    container_name: db
    restart: unless-stopped
    tty: true
    ports:
      - "3306:3306"
    environment:
      MYSQL_DATABASE: laravel
      MYSQL_ROOT_PASSWORD: password
      SERVICE_TAGS: dev
      SERVICE_NAME: mysql
    volumes:
      - dbdata:/var/lib/mysql/
      - ./mysql/my.cnf:/etc/mysql/my.cnf
    networks:
      - app-network

#Networks
networks:
  app-network:
    driver: bridge
#Volumes
volumes:
  dbdata:
    driver: local
# docker-compose.yml
version: '3'
services:
#PHP
app:
build:
context: .
dockerfile: Dockerfile
image: ilosrim/php
container_name: app
restart: unless-stopped
tty: true
environment:
SERVICE_NAME: app
SERVICE_TAGS: dev
working_dir: /var/www
volumes:
- ./:/var/www
- ./php/local.ini:/usr/local/etc/php/conf.d/local.ini
networks:
- app-network
#Nginx
webserver:
image: nginx:alpine
container_name: webserver
restart: unless-stopped
tty: true
ports:
- "8989:80"
- "443:443"
volumes:
- ./:/var/www
- ./nginx/:/etc/nginx/conf.d/
networks:
- app-network
#MySQL
db:
image: mysql:8.0.37
container_name: db
restart: unless-stopped
tty: true
ports:
- "3306:3306"
environment:
MYSQL_DATABASE: laravel
MYSQL_ROOT_PASSWORD: password
SERVICE_TAGS: dev
SERVICE_NAME: mysql
volumes:
- dbdata:/var/lib/mysql/
- ./mysql/my.cnf:/etc/mysql/my.cnf
networks:
- app-network
#Networks
networks:
app-network:
driver: bridge
#Volumes
volumes:
dbdata:
driver: localStep 03:
Create a new Dockerfile with:
vim Dockerfilevim DockerfileThe name of the file should be “Dockerfile” without any extension
Add these Configurations in Dockerfile.
“FROM” use php8.1-fpm as base image
“COPY” necessary files to container
“WORKDIR” sets working dir to /var/www
“RUN” install necessary packages and composer
“EXPOSE” exposes the port to listen
“CMD” define to run php-fpm
FROM php:8.3-fpm

# Copy composer.lock and composer.json
COPY composer.lock composer.json /var/www/

# Set working directory
WORKDIR /var/www

# Install dependencies
RUN apt-get update && apt-get install -y \
    build-essential \
    libpng-dev \
    libjpeg62-turbo-dev \
    libfreetype6-dev \
    locales \
    zip \
    jpegoptim optipng pngquant gifsicle \
    vim \
    unzip \
    git \
    curl \
    libonig-dev \
    libzip-dev \
    libgd-dev
# Clear cache
RUN apt-get clean && rm -rf /var/lib/apt/lists/*
#Mine

# Install extensions
RUN docker-php-ext-install pdo_mysql mbstring zip exif pcntl
RUN docker-php-ext-configure gd --with-external-gd
RUN docker-php-ext-install gd

# Install composer
RUN curl -sS https://getcomposer.org/installer | php -- --install-dir=/usr/local/bin --filename=composer

# Add user for laravel application
RUN groupadd -g 1000 www
RUN useradd -u 1000 -ms /bin/bash -g www www

# Copy existing application directory contents
COPY . /var/www

# Copy existing application directory permissions
COPY --chown=www:www . /var/www

# Change current user to www
USER www

# Expose port 9000 and start php-fpm server
EXPOSE 9000
CMD ["php-fpm"]
FROM php:8.3-fpm
# Copy composer.lock and composer.json
COPY composer.lock composer.json /var/www/
# Set working directory
WORKDIR /var/www
# Install dependencies
RUN apt-get update && apt-get install -y \
build-essential \
libpng-dev \
libjpeg62-turbo-dev \
libfreetype6-dev \
locales \
zip \
jpegoptim optipng pngquant gifsicle \
vim \
unzip \
git \
curl \
libonig-dev \
libzip-dev \
libgd-dev
# Clear cache
RUN apt-get clean && rm -rf /var/lib/apt/lists/*
#Mine
# Install extensions
RUN docker-php-ext-install pdo_mysql mbstring zip exif pcntl
RUN docker-php-ext-configure gd --with-external-gd
RUN docker-php-ext-install gd
# Install composer
RUN curl -sS https://getcomposer.org/installer | php -- --install-dir=/usr/local/bin --filename=composer
# Add user for laravel application
RUN groupadd -g 1000 www
RUN useradd -u 1000 -ms /bin/bash -g www www
# Copy existing application directory contents
COPY . /var/www
# Copy existing application directory permissions
COPY --chown=www:www . /var/www
# Change current user to www
USER www
# Expose port 9000 and start php-fpm server
EXPOSE 9000
CMD ["php-fpm"]Step 04:
Create a new directory nginx and create a new file in it “default.conf” for nginx configurations.
mkdir nginx
cd ngnix
vim default.conf
mkdir nginx
cd ngnix
vim default.confAdd the following nginx configurations in default.conf
server {
    listen 80;
    index index.php index.html;
    error_log  /var/log/nginx/error.log;
    access_log /var/log/nginx/access.log;
    root /var/www/public;
    location ~ \.php$ {
        try_files $uri =404;
        fastcgi_split_path_info ^(.+\.php)(/.+)$;
        fastcgi_pass app:9000;
        fastcgi_index index.php;
        include fastcgi_params;
        fastcgi_param SCRIPT_FILENAME $document_root$fastcgi_script_name;
        fastcgi_param PATH_INFO $fastcgi_path_info;
    }
    location / {
        try_files $uri $uri/ /index.php?$query_string;
        gzip_static on;
    }
}
server {
listen 80;
index index.php index.html;
error_log /var/log/nginx/error.log;
access_log /var/log/nginx/access.log;
root /var/www/public;
location ~ \.php$ {
try_files $uri =404;
fastcgi_split_path_info ^(.+\.php)(/.+)$;
fastcgi_pass app:9000;
fastcgi_index index.php;
include fastcgi_params;
fastcgi_param SCRIPT_FILENAME $document_root$fastcgi_script_name;
fastcgi_param PATH_INFO $fastcgi_path_info;
}
location / {
try_files $uri $uri/ /index.php?$query_string;
gzip_static on;
}
}Step 05:
Create these files and directories:
php/local.ini
mkdir php
cd php
vim local.ini
mkdir php
cd php
vim local.iniAdd this piece of code in local.ini
upload_max_filesize=40M
post_max_size=40Mupload_max_filesize=40M
post_max_size=40Mmysql/my.cnf
mkdir mysql
cd mysql
vim my.cnf
mkdir mysql
cd mysql
vim my.cnfAdd this piece of code in my.cnf
[mysqld]
general_log = 1
general_log_file = /var/lib/mysql/general.log[mysqld]
general_log = 1
general_log_file = /var/lib/mysql/general.logStep 06:
Final Step is to build the image and run it.
sudo docker-compose build

sudo docker-compose up -d
sudo docker-compose build
sudo docker-compose up -dNow we have php laravel nginx and mysql containers up and running we can check it by using docker ps.

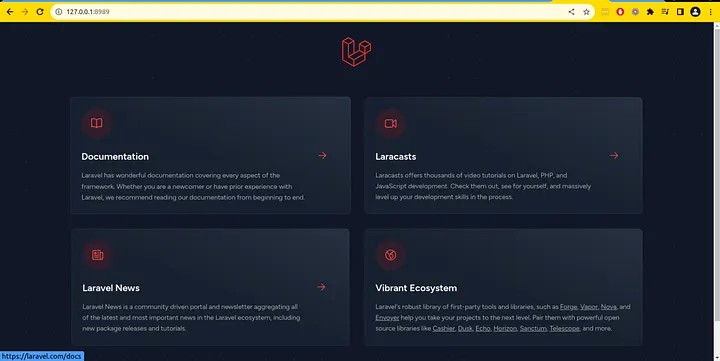
Final Result:
Now our laravel application is up and running, we can access it from our port 8989 as we defined in our dokcer-compose file. http://localhost:8989

Conclusion: Embrace Containerization for Seamless Laravel Development
In this article, we embarked on a journey to containerize a Laravel project, combining PHP, Nginx, and MySQL into a cohesive development stack. We explored the prerequisites, created Docker Compose files, and configured the services to work together seamlessly. By doing so, we unlocked a multitude of benefits, including isolation, portability, scalability, and version control, all of which are crucial for modern web development.
For an in-depth look at the entire project, including the Docker Compose configuration and Laravel codebase, you can access the GitHub repository here.
Feel free to fork, experiment, and adapt the project to your specific needs. We hope this article has equipped you with the knowledge and confidence to embark on your own containerization journey and elevate your Laravel development experience.
Happy Coding!